






RemoteScreen Tutorial: Start to Finish (Videos and Written Steps)
On this page 28 sections
Summary
This tutorial walks you through RemoteScreen from start to finish in three short videos: what your patient or client sees, how the AI health intake works, and how you process a submission in PostureScreen.
Prefer to read? The same steps are written out under each video, so you can watch, read, or do both.
Start here: record your own introduction video
Before you send your first invitation, record a short video of your own and share it with your patients and clients. YouTube works well for this. A walkthrough that comes from you, their doctor, therapist or fitness professional, tells people why you are asking and what to expect, and it is something you can use to market your practice.
What to cover in your video:
- Why you use RemoteScreen: you can look at their posture, their movement and their health history before they come in.
- How they can screen themselves at home in Selfie Mode, with a voice guiding them.
- How they can screen a family member, or have someone help take their photos.
- How they can complete their health intake before the visit.
- The steps they will see, from entering your provider code or email address to tapping Submit to Provider.
Share the link with every RemoteScreen invitation, on your website and on your social channels. The first video below shows exactly what your patients and clients will see, so it is a good outline for your own.
Before you start
- RemoteScreen is free for your patients and clients. It is a web app that opens in the phone’s browser, so there is nothing to install.
- On your side you need PostureScreen on iOS with an Unlimited Subscription, plus a Cloud Services subscription.
- Every Cloud Services plan includes unlimited posture photo and movement video uploads, limited only by your storage.
- The AI-Guided Health History (RemoteScreen’s AI voice intake) is available in the USA only at this time. It needs Cloud Services Platinum or higher plus a PostureScribe.AI subscription. RemoteScreen posture photos and movement videos are available worldwide. See pricing for what each plan includes.
- In PostureScreen, both subscriptions are under Upgrades.
Video 1: Getting started with RemoteScreen
What your patient or client sees, from the welcome screen to posture photos and movement videos. About 6 minutes.
 6:19
Step 1: Open RemoteScreen and tap Get Started
The patient opens RemoteScreen on their phone. The Welcome screen lists what they can do: enter their information, take front and side posture photos, and complete the AI-guided patient history intake. A voice reads each screen aloud as they go.
Step 2: Connect to the provider
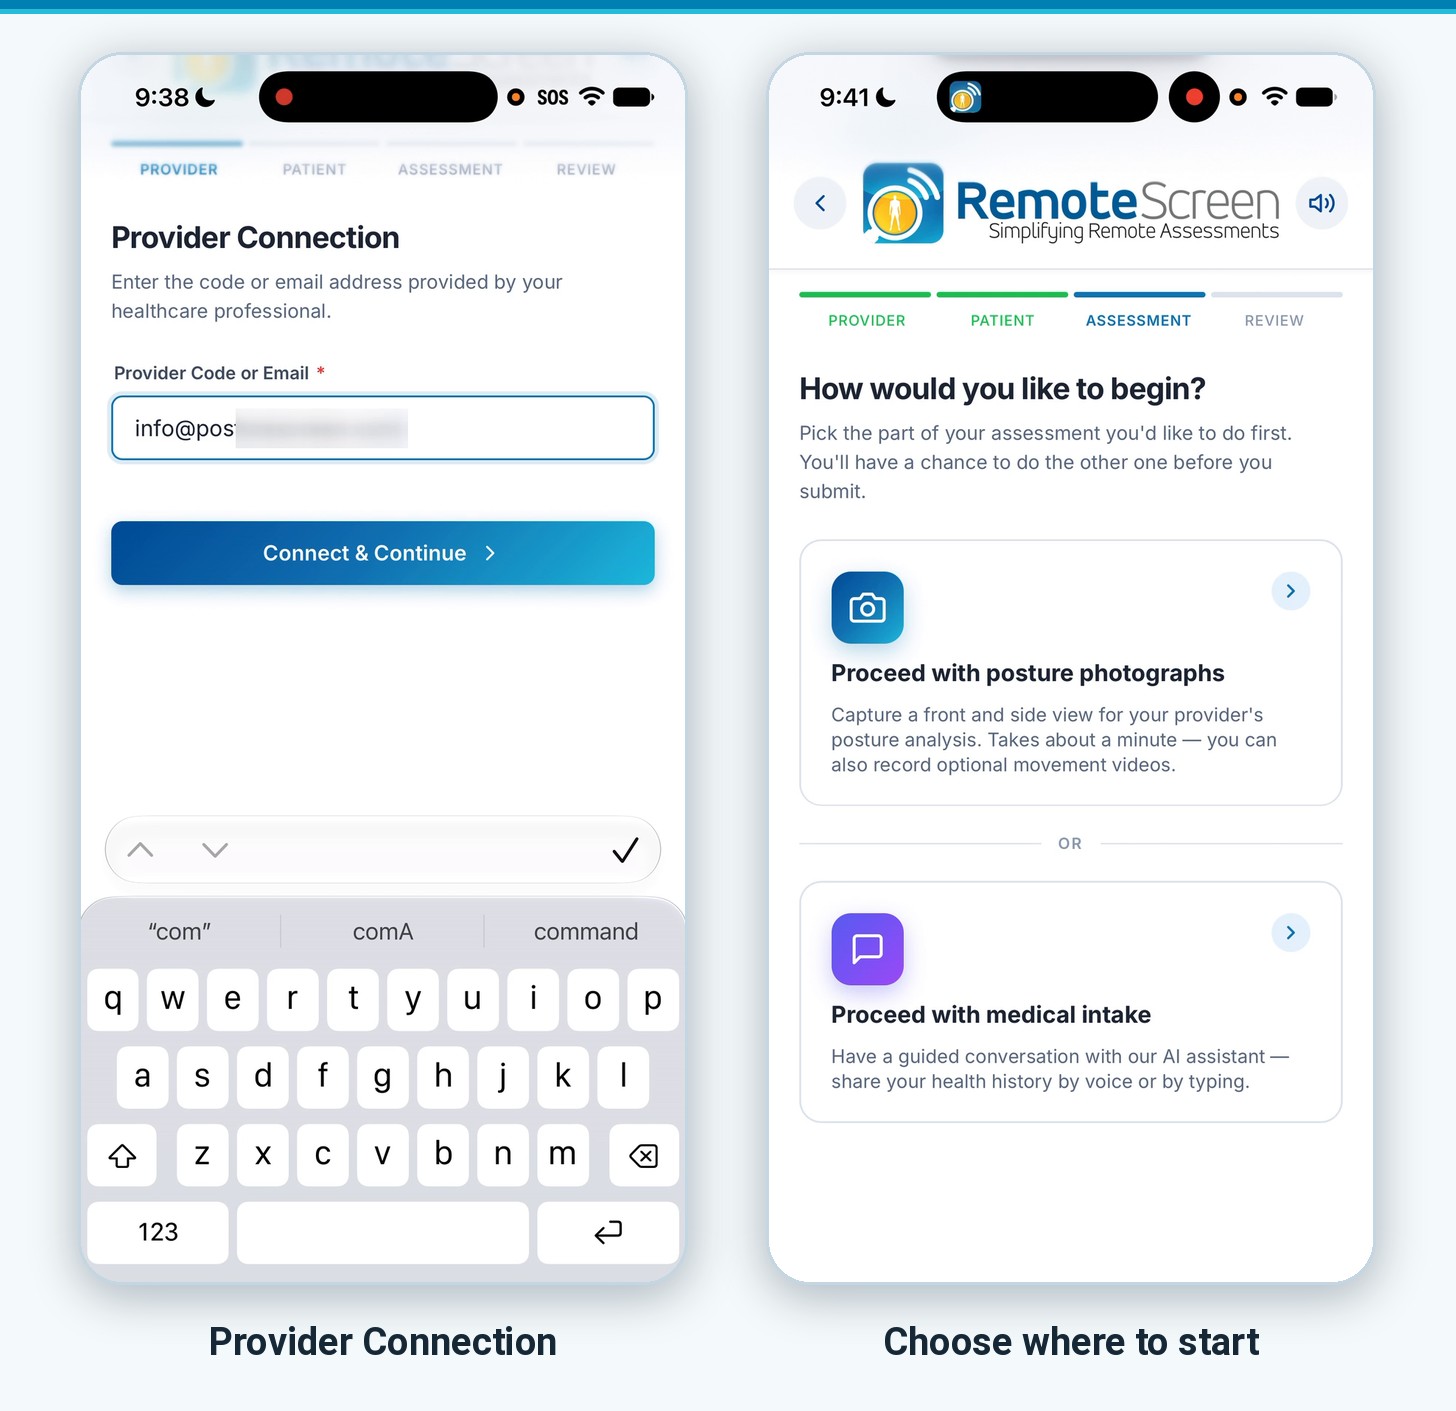
On Provider Connection, the patient enters the provider code or email address you sent them, then taps Connect & Continue. This connects them to you and sends everything they submit into your private cloud.
Step 3: Read the consent and agree
RemoteScreen reads the Consent & Permissions screen aloud. To go on, the patient types YES and taps Agree & Continue.
Step 4: Enter the patient details
The patient fills in their name, date of birth, height, weight and contact email, then taps Continue.
Step 5: Choose where to start
RemoteScreen asks “How would you like to begin?” The patient taps Proceed with posture photographs or Proceed with medical intake. Whichever they pick first, they get the chance to do the other one before they submit.
Step 6: Take the posture photos
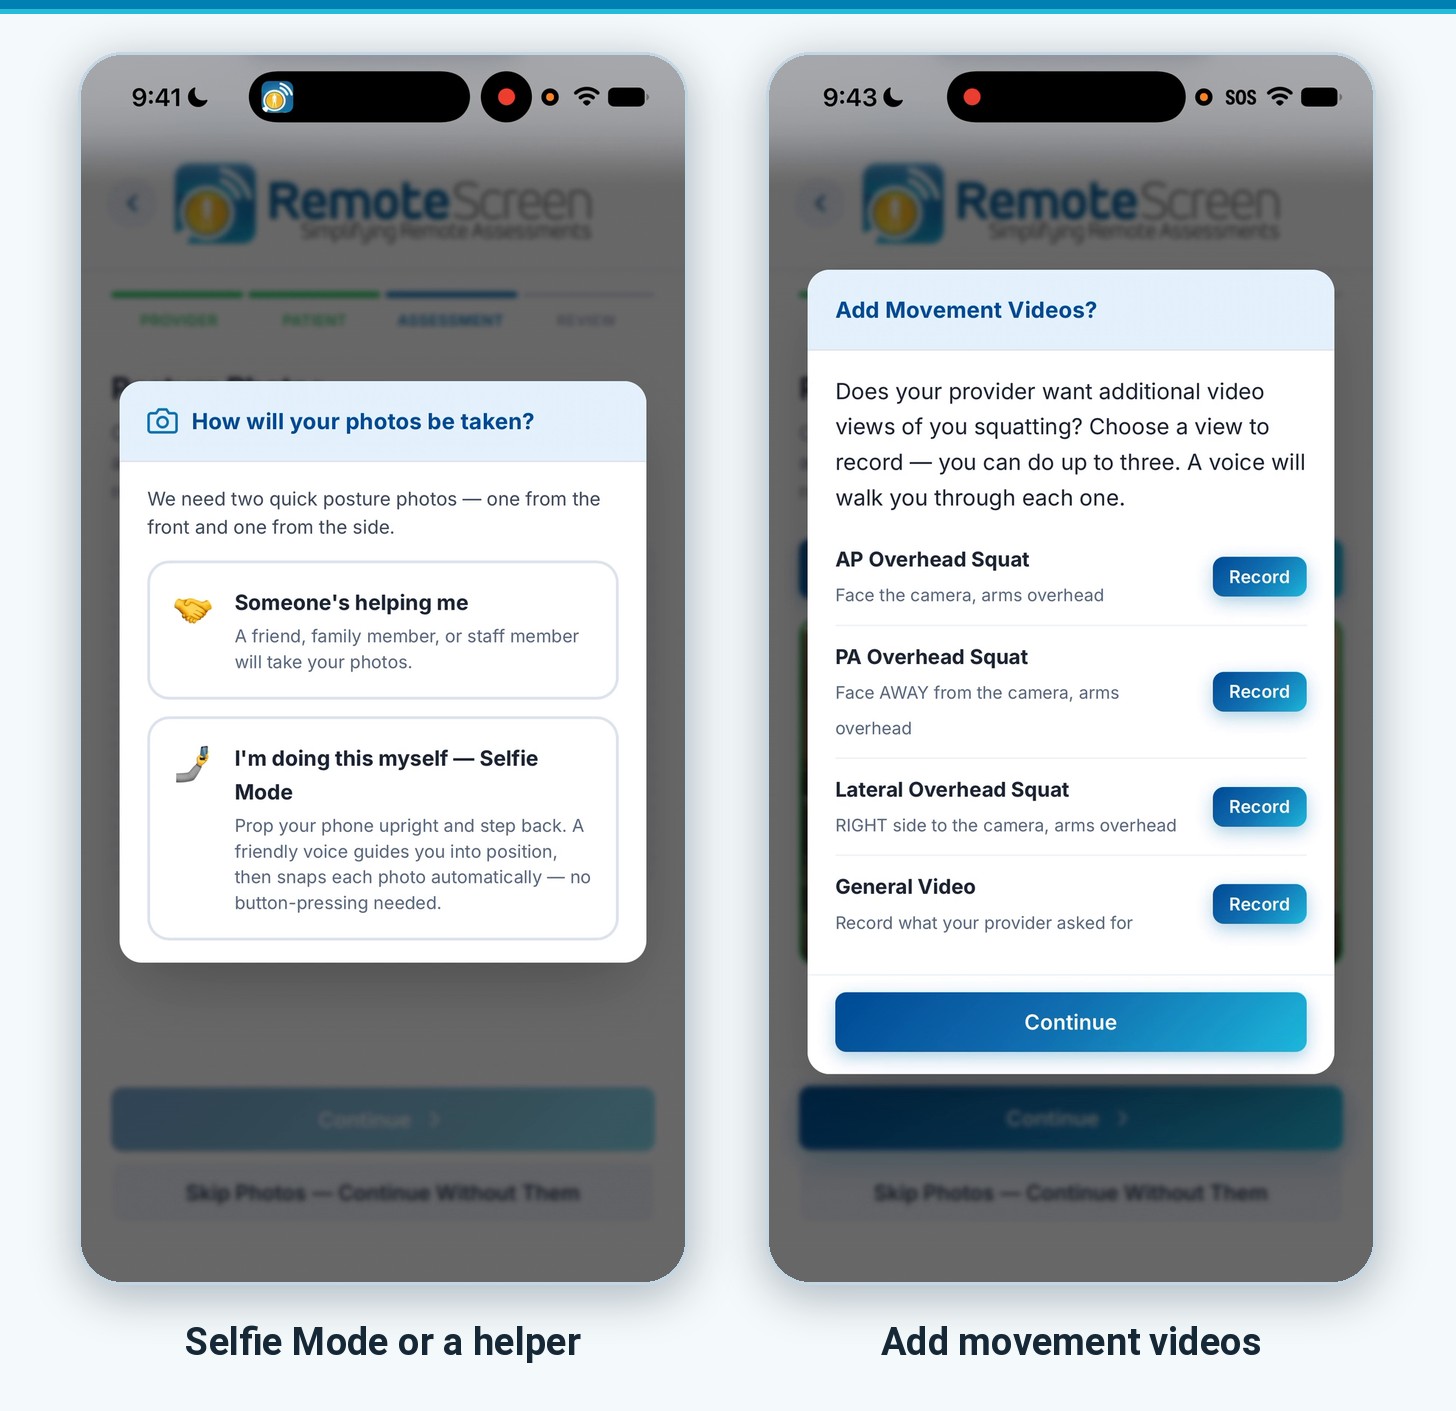
The patient chooses Someone’s helping me or I’m doing this myself — Selfie Mode. In Selfie Mode they prop the phone upright, step back, and tap Allow when the phone asks to use the camera.
A voice guides them into position and takes each photo automatically: the front view, then the side view. The guide knows which way the person is facing, so if they turn the wrong way it catches it and coaches them into position. They can retake a photo before going on.
Step 7: Add movement videos (optional)
On Add Movement Videos, the patient can record up to three views: AP Overhead Squat, PA Overhead Squat and Lateral Overhead Squat. There is also a General Video for anything else you asked to see, such as a range of motion that bothers them or a forward bend with their back to the camera.
They tap Record, follow the voice, tap Use This Video, and then Continue.
Step 8: Add a health history, or submit
RemoteScreen asks “Add a patient history intake?” The patient taps Yes, Start Intake to go on to the AI health intake shown in Video 2, or No, continue to submit to send the photos and videos alone. You can work from photos and videos by themselves.
Video 2: The AI health intake
How the AI Health Intake Assistant takes a history. An intake can run up to 20 minutes, and that is time it saves you; the video shows a short sample. About 5 minutes.
4:45
Step 1: Begin the interview
On AI Patient Intake, the patient chooses Voice or Text and taps Begin Interview, then taps Allow so the assistant can use the microphone. They can switch between voice and text at any time.
Step 2: Answer the questions
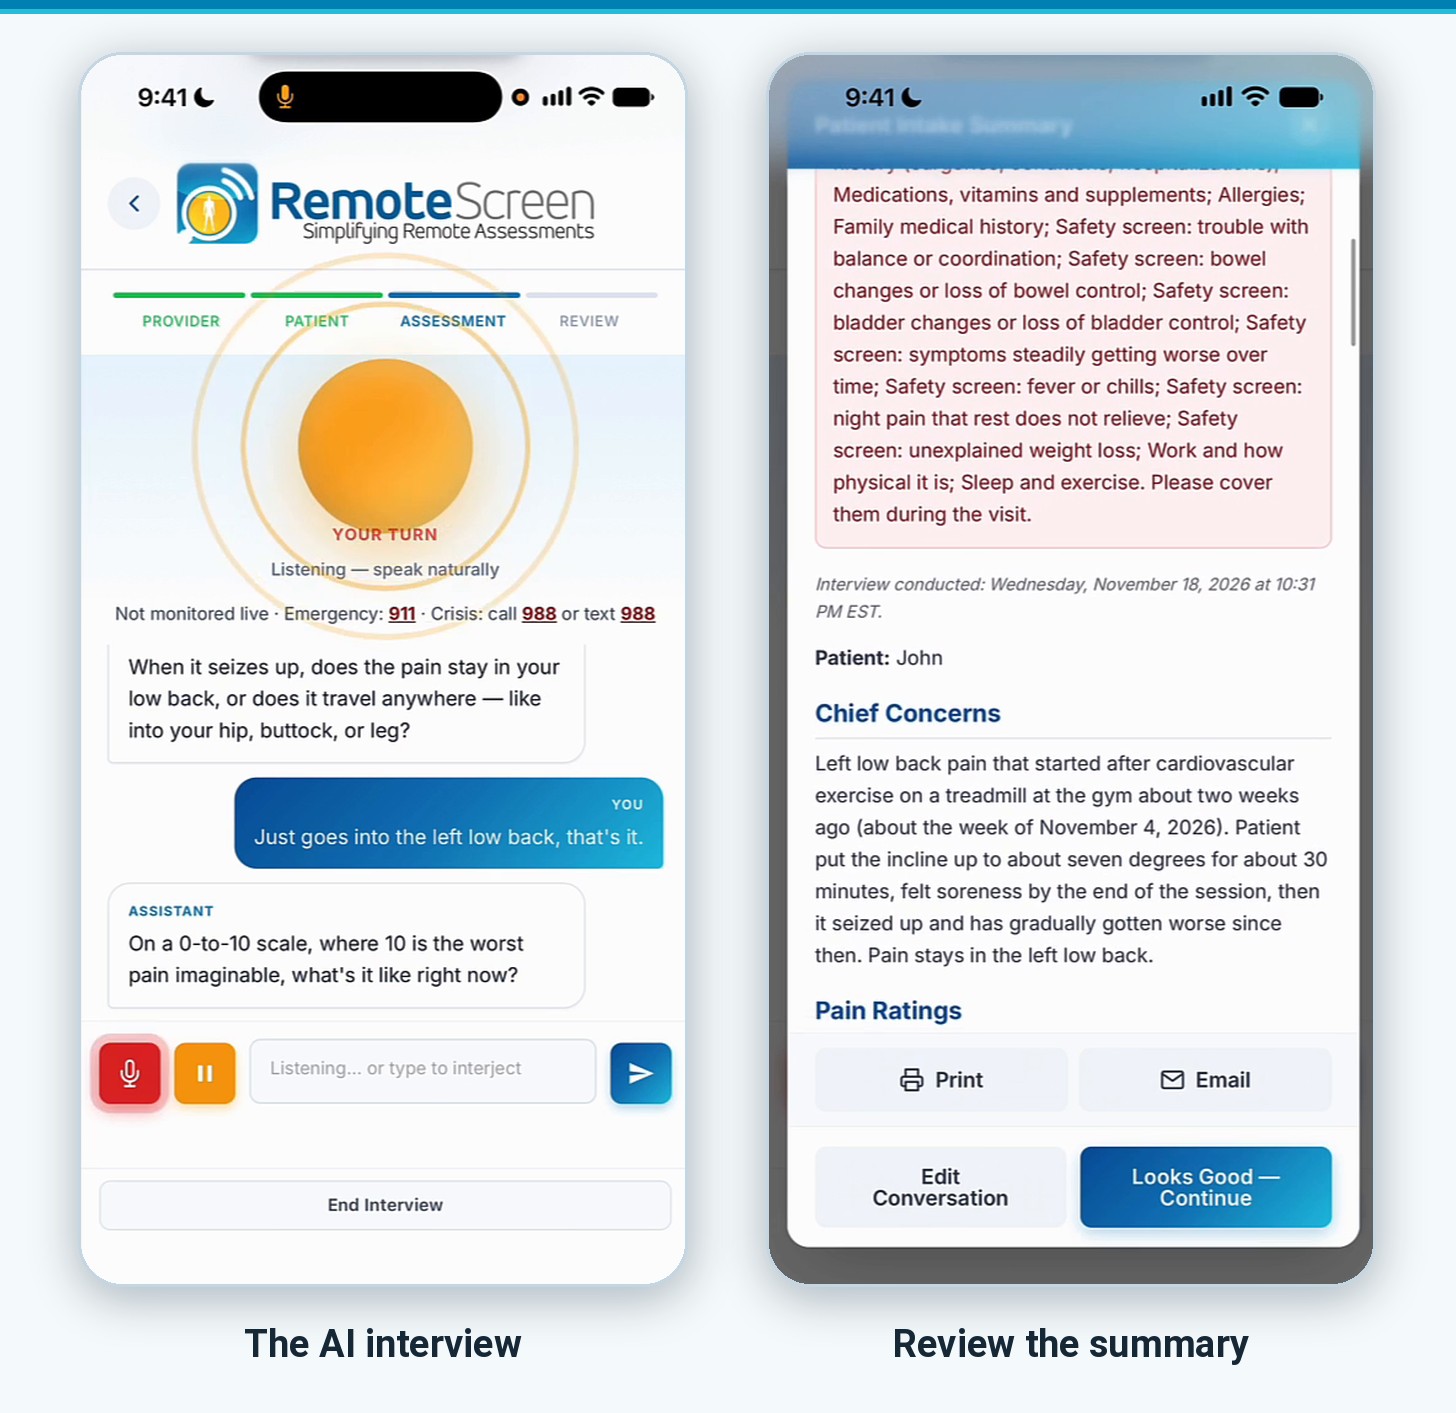
The assistant asks one question at a time and bases each question on the patient and their complaints. The patient answers in their own words, and can pause or type an answer instead.
Step 3: End the interview
When an interview runs all the way through, the report is generated automatically. To stop early, the patient taps End Interview or asks the assistant to stop, then taps End & Generate Report. Generating the report takes about 5 to 15 seconds.
Step 4: Review the summary
The patient reads the Patient Intake Summary. If they did not finish the interview, the report tells you which topics were not covered. They can print it or email themselves a copy. When it looks right, they tap Looks Good — Continue.
Step 5: Add posture photos, or skip to the review
If the patient has not taken photos yet, RemoteScreen asks “Add posture photographs?” They tap Yes, Take Photos or Skip, Go to Review. They can send photos and videos alone, a health intake alone, or both, which is what most people will do.
Step 6: Submit to Provider
On Review & Submit, the patient checks their details and taps Submit to Provider. They see Assessment Submitted, and you get an email notification that a new RemoteScreen has been submitted.
Video 3: Processing a RemoteScreen in PostureScreen
Your side: how a submission comes into PostureScreen and what you can do with it. About 3 minutes.
3:09
Step 1: Check your subscriptions
In PostureScreen, open Upgrades. You need the Cloud subscription, which is the one that includes RemoteScreen. If you want the notes, you need the PostureScribe.AI subscription as well.
Step 2: Open RemoteScreen
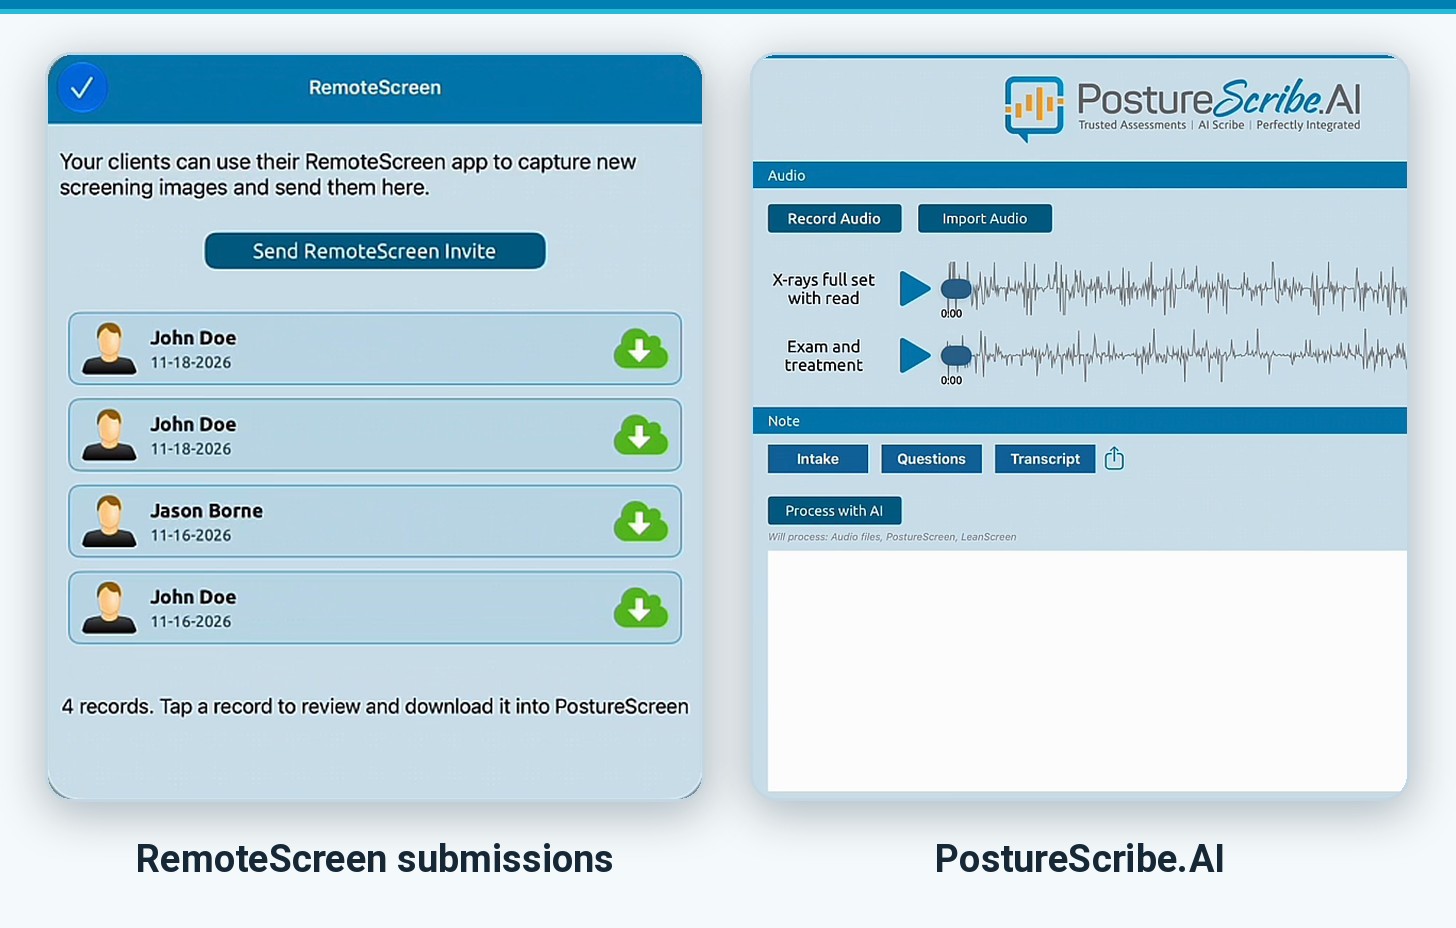
On the Client List, tap RemoteScreen to see the submissions that have been sent in to you. Tap a record to review it and download it into PostureScreen.
Step 3: Match the client, or create a new one
PostureScreen checks for duplicates first. If something matches a client you already have, such as a date of birth or an email address, it asks whether this is one of them. Tap Add to the client for an existing client or Create a new client for a new person, and the submission downloads.
Step 4: Digitize the posture photos
Once it has downloaded, it is as if the assessment had been done in your office. Open PostureScreen for that client and the posture photos are already there. Tap Start Digitizing and fine-tune any points you like, view by view.
Step 5: Run a LeanScreen on the same photos (optional)
You can run a LeanScreen on the same person at the same time. Tap Copy Photos From PostureScreen, then place the points. This part is done by hand, so be precise.
Step 6: Review the health history
Go back to the client’s record and open the health history. Intake shows everything the patient talked about. Questions lists points the AI flags for you to ask about, including any red flags, so you are prepared before the visit. It does not replace your own screening. Transcript shows the conversation.
Step 7: Record or import the visit
With PostureScribe.AI, tap Record Audio to record the visit as ambient notes (the patient signs a consent first), or tap Import Audio to bring in recordings made earlier. You can have as many audio clips as you want.
Step 8: Process with AI
Tap Process with AI and choose a narrative, such as a patient summary, a referring doctor summary or the coding assistant. PostureScribe.AI takes the posture findings, the body composition and the whole history and creates the notes you want. PostureScribe.AI has its own tutorials in this knowledge base.
Need help?
Email support@posturescreen.com or send us a message and we will help you get set up.
Related articles
-
 RemoteScreen
 Overview
RemoteScreen is the perfect companion app to PostureScreen, SquatScreen, and LeanScreen, enabling professionals to conduct remote…
Video · 5:471 min read
-
RemoteScreen
Downloading and Processing a RemoteScreen Movement Screen (Video)
In this tutorial we review how to download a client’s video for their movement assessment.
Video · 2:44
-
RemoteScreen
Downloading and Processing a RemoteScreen Posture Assessment
In this tutorial we will review how to process a RemoteScreen client upload in PostureScreen. RemoteScreen is the companion app used by…
Video · 5:472 min read
-
RemoteScreen
RemoteScreen – How to set up and use.
RemoteScreen is a companion application for clients/patients to securely share their photos and videos to their healthcare or fitness…
Video · 3:561 min read
-
RemoteScreen
RemoteScreen Email Campaign Ideas
In this tutorial we review just some basic ideas we recommend you use if you are doing an email campaign to market for your virtual…
Video · 4:561 min read
-
RemoteScreen
RemoteScreen Invitations – Sending Client RemoteScreen Code
In the following tutorial we will review how to invite both an established client / patient and non-established client / patient to your…
Video · 2:281 min read
Have a question?
Talk to the people who build PostureScreen and PostureRay.
PostureScreen support is by email. Live PostureRay support runs Monday through Friday, 9 AM–5 PM Eastern (excluding U.S. holidays).